Hey there, fellow riggers, lifting supervisors, and anyone who’s ever stared at a heavy load (think steel beams, precast concrete panels, massive machinery parts) and thought, “How the hell do we get this up safely without anything slipping or tipping?” As the owner of a chain sling and hardware riggings supplier—you know, the guy you call when you don’t have time to Google “rigging safety 101” at 7 a.m.—I’ve seen my fair share of messy multi-point lift fails. Last year, a local construction crew tried hoisting a 12,000-lb steel truss with mismatched slings and a cheap shackle that snapped mid-lift. Let’s just say their day went from “on schedule” to “waiting for a new shackle and a lecture from OSHA” real fast. Chain Sling and Hardware Riggings
Multi-point lifts don’t have to be a headache, though. They’re actually one of the most efficient ways to lift evenly distributed, super heavy loads—if you get the chain slings and rigging hardware right. I’ve spent 10 years obsessing over this stuff (ask my wife, I can talk shackle ratings at dinner), and today I’m breaking down exactly how to nail a multi-point lift without the panic, the fines, or the “how did we mess that up?” post-lift debacle. Let’s dive in, no stuffy jargon, just real tips I’ve tested (and learned from my mistakes) over the years.
First off, let’s get one thing straight: a multi-point lift isn’t just “hooking four slings to a load and cranking it.” It’s about matching every part of your setup to the load’s weight, shape, and center of gravity (CG). That CG is the big invisible party here—if you don’t account for it, even the fanciest chain slings will do weird stuff, like spin sideways or drop one end first. I always tell my customers: treat the CG like a cat at a vet’s office—stay aware of where it is, or you’re gonna get scratched.
Step 1: Do your pre-lift homework before touching a single chain. I’m not talking about a 2-minute glance at the load—this is the boring but non-negotiable stuff. First, get the exact weight of the load. Yeah, I know, some guys guesstimate because “it’s a steel beam, it’s heavy.” But guesstimating is how you end up with slings rated for 8,000 lbs on a 10,000-lb load. Don’t be that guy. Use a scale, or if it’s a prefabricated part, check the manufacturer’s specs—9 times out of 10, they’ll list the weight right there. Next, map the CG. For simple loads like a flat steel plate, it’s dead center. But for weird shapes, like an unevenly weighted machinery base, you can mark it by balancing the load on a fulcrum (a small log or a piece of square tubing works) until it’s level. Mark that spot with a Sharpie—trust me, it’s worth 10 minutes of your time.
Then, figure out how many points you need. Most multi-point lifts use 2, 3, or 4 points. For symmetric, evenly weighted loads, 4 points work great because they spread the weight evenly. But for lopsided loads, 3 points might be better—less chance of one point taking all the strain. Once you know the number of points, calculate the load per point. This is where the math is easy, I promise. If you have a 12,000-lb load and 4 points, each point needs to handle at least 3,000 lbs. But wait—chain slings have that angle factor, right? Oh, right, that’s the other thing most people forget. If your sling is at a 60-degree angle from the load, instead of straight up (90 degrees), the load on that sling jumps by like 15%? Wait no, let me get that right—at 30 degrees, it’s double the straight load. Yeah, that’s a big one. So if your point load was supposed to be 3,000 lbs at 90 degrees, at a 45-degree angle, it’s actually ~4,200 lbs. So you need to size your chain slings to account for that angle, not just the straight load. I usually tell customers to add 20% to their per-point load to play it safe—better to have a sling that’s a little overrated than one that snaps mid-lift.
Step 2: Pick the right chain slings for the job. Not all chain is created equal, and I see so many people grabbing the cheapest chain they can find. Here’s the rule: use Grade 80 or Grade 100 chain slings for multi-point lifts. Grade 70 is for towing, not heavy lifting—don’t mix those up. Grade 80 is the workhorse, it’s strong enough for most general construction and industrial lifts, and it’s easy to spot (it has blue markings on the links). Grade 100 is for super heavy, high-stakes lifts—like hoisting bridge components, it’s lighter than Grade 80 for the same strength, which is a nice bonus when you’re lifting tons of weight.
Also, matching the sling length is key for even weight distribution. If you have four slings, and two are 10 feet long and two are 8 feet, the two shorter slings will take way more load. So measure each sling before you buy, or cut them to the exact same length (most good suppliers, me included, can custom cut slings for you to avoid that headache). Another thing: don’t forget to check your slings for wear before every use. I’m talking about cracks in the links, stretched links (if a link is longer than it should be, that’s a no-go), or any corrosion. OSHA requires you to inspect every sling before each use, and I’ve seen guys skip that and end up with a sling that’s so worn it can barely hold half its rated load.
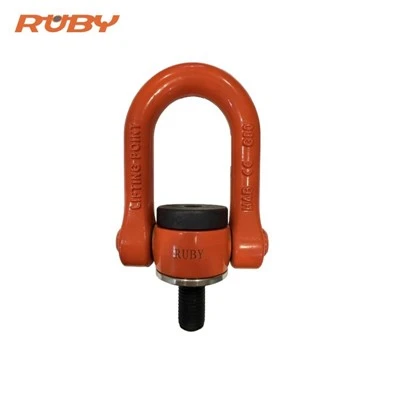
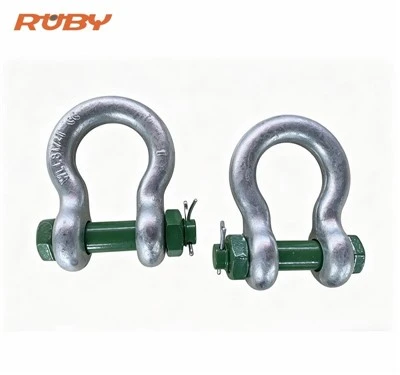
Step 3: Rigging hardware—don’t overlook the small stuff. Shackles, master links, spreader bars, these are the unsung heroes of multi-point lifts. The wrong hardware can turn a good sling setup into a disaster faster than a grease leak on a crane. Let’s start with shackles: you need “bow shackles” or “screw pin shackles” rated for lifting, not the cheap ones you use for tying down a trailer. Screw pin shackles are better for multi-point lifts because they don’t vibrate loose mid-lift like bolt pin shackles sometimes do. And make sure the shackle rating matches (or is higher) than the sling rating. A 3,000-lb rated shackle won’t help if your sling is 4,000 lbs.
Master links are the thing you connect all your slings to at the top (where they hook to the crane hook). Get a master link with a rated capacity that’s at least the total load of all your slings. For multi-point lifts, I also swear by spreader bars (or lifting beams) when you have a long, narrow load like a steel beam or a precast wall panel. Spreader bars keep the sling angles consistent, so each sling carries exactly the load it’s supposed to, instead of some being at a steep angle and taking extra strain. They might cost a little extra upfront, but they save you from a lot of stress (and fines) later.
Also, when you’re connecting slings to the load, use the right hardware there too—like attaching the slings to lifting lugs on the load, not just wrapping the chain around the load (unless it’s a load that’s designed for that, like a pipe). If you wrap chain around a load without a proper attachment point, you can damage the load and put uneven strain on the sling links. That’s a quick way to get a load that slips, or a sling that fails at the point where the chain is bent around a sharp edge.
Step 4: Set up the lift correctly, no cutting corners. Okay, you’ve got your slings, your hardware, your load mapped—now how do you actually hook everything up? First, center the load over the crane’s hook. If the CG is dead center, the crane should lift straight up evenly. If the CG is off to one side, you might need to adjust the sling lengths a little to balance it—like making the slings on the heavier side longer, so the load tilts slightly to level out. I always do a “test lift” first, no joke. Lift the load only 6 to 12 inches off the ground, then stop. Check that the load is level, that none of the slings are twisted (twisted slings can add extra stress and even cause the chain to snap), and that all the hardware is tight—no loose pins, no shackles that are only half-engaged.
Another thing: when you’re using multiple slings, don’t hook them all to the same spot on the crane hook. If you hook four slings to a single hook point, they’ll spin and twist as you lift, which messes with the weight distribution. Use a hook with multiple points, or use a master link at the top to connect all your slings, so they hang straight without twisting. I learned that one the hard way—first month in business, a customer hooked four slings to one hook, the load twisted, and a sling link bent. We replaced the sling for free, and they still shop with me now, but that’s a mistake I won’t let any first-timer make twice.
Step 5: Safety checks before you lift. I’m not here to scare you, but safety isn’t optional here. Before you hit the “lift” button (or flip the crane control, whatever), go through this quick checklist:
-
Double-check all ratings: Slings, shackles, master link, spreader bar—all have to handle at least the total load, plus angle factors. I’ve got a little cheat sheet I give all my customers that lists common angle factors, so you don’t have to calculate it on the job site when you’re in a hurry.
-
Inspect everything again: No stretched chain links, no cracks in shackles, no twisted slings. If something looks even a little off, replace it—don’t “make it work” because you don’t want to wait for a replacement.
-
Clear the area: Make sure no one is under the load, no one is standing too close to the crane’s swing path. Even a small load swinging can hurt someone, let alone a heavy one.
-
Assign a signal person: If you’re not the one operating the crane, make sure you have a certified signal person who knows hand signals and radio protocols. No guessing what a “little higher” means—clear, consistent signals keep everyone safe.
Wait, and one last thing: what about when you’re done? Take care of your chain slings and hardware, and they’ll take care of you. Don’t drag chain slings across the ground (that scratches the links, weakening them), don’t leave them out in the rain to rust, store them in a dry place, and wipe them down after use. I’ve had customers bring back slings that are 10 years old because they take care of them, and they still pass all inspections.
Now, I know this sounds like a lot, but once you do a few multi-point lifts following these steps, it becomes second nature. I’ve been supplying rigging gear for 10 years, and the best part is hearing back from customers who tell me their lift went smooth, no issues, no headaches. The worst part is hearing about a lift that went wrong because someone skipped a step.
If you’re working on a multi-point lift soon, and you’re not sure if your slings or hardware are right, or you need help sizing things, hit me up. I don’t do sales pitches that are all talk—give me the details on your load (weight, shape, number of lift points), and I’ll help you pick exactly what you need, no overcharging for gear you don’t use. Rigging doesn’t have to be complicated, it just has to be done right.
Chain Sling References:
- Occupational Safety and Health Administration (OSHA). (2022). Rigging Equipment and Use (29 CFR 1926 Subpart CC). U.S. Department of Labor.
- American Society of Mechanical Engineers (ASME). (2019). Standard for Lifting Devices for Slings (ASME B30.9).
- Chain Industry Association (CIA). (2021). Grade 80 and Grade 100 Chain Sling Safety Guidelines.
- National Commission for the Certification of Crane Operators (NCCCO). (2020). Multi-Point Lift Planning and Execution Manual.
Hangzhou Ruby Imp. & Exp. Co., Ltd.
As one of the most experienced chain sling and hardware riggings manufacturers and suppliers in China, we offer a wide range of products with superior quality. We warmly welcome you to wholesale custom made chain sling and hardware riggings at competitive price from our factory.
Address: Taoyuan Industrial Park, Puyang Town, Xiaoshan, Hangzhou, Zhejiang, China.
E-mail: Sales5@z2lifting.com
WebSite: https://www.rubylifting.com/
